THOUSANDS OF FREE BLOGGER TEMPLATES

Notice

My Daughter was born on Feb 14, 2010 and she is wonderfully healthy! Thank you for all the wonderful emails about everything. I just wanted to say that for right now since life has gotten so busy I am working mainly on tags and layouts. There will be the occasional tutorial but not as many as before. I am sorry if this causes any problems, but family comes first! I hope this finds all my followers doing well! Blessed Be! ~Lori

Quick Links

These are the Quick Links to my most used supplies =]

PSP
Alien Skin
Vix
Squirlz Water Reflections
Garvey
Gorjuss
Animation Shop

Thursday, November 11, 2010

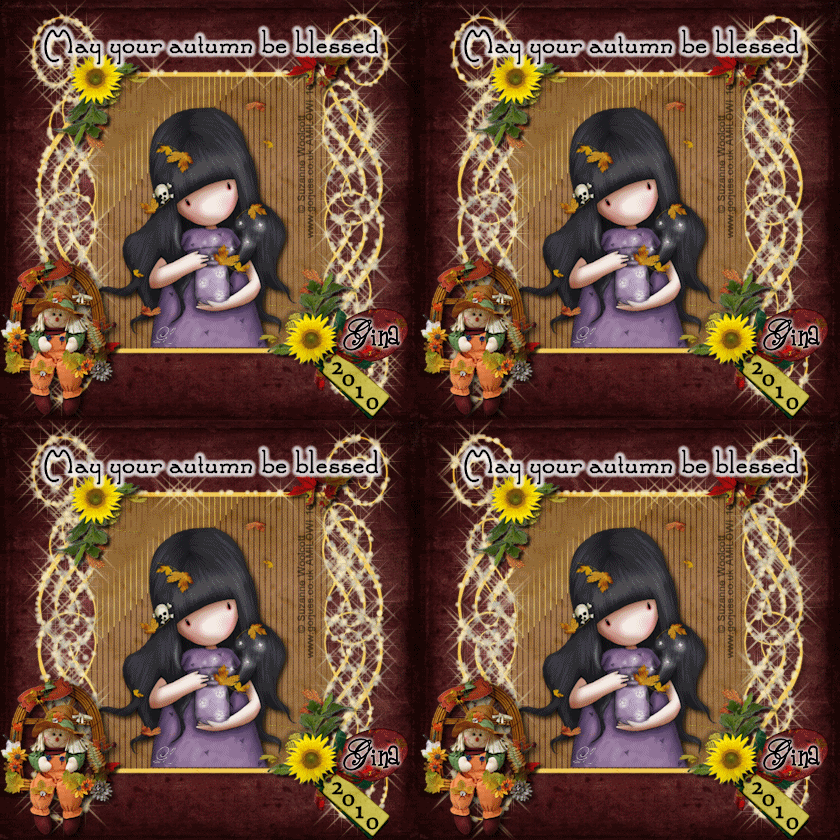
Sparkling Autumn

For this tutorial I have used the following supplies
  1.     November Harvest kit from Gina's Gems available HERE
  2.     Alien Skin Xenofix 2   Constellation Available in quick links
  3.     Alien Skin 5 Impact G radiant Glow  Available in quick links
  4.     The Beautiful work of Gorjuss available in my quick links
  5.     Vix Mask 421 available in quick links.  Please have this preloaded into your masks folder.
Thank you Gina for allowing me to use your kit as well as adding me to your Creative Team!

Let us begin,
  •     First open your background and foreground papers of choice.
  •     Apply Mask to your foreground paper.  Merge Group, Copy and paste onto your background paper.
  •     Copy and paste your tube where you would like
  •     Add elements as desired.  I have used NH Botanical Flower 4, NH Branch 3,  NH Double tag 3, NH Fabric Leaves deco 1 and NH Scarecrow 4.  Resize and place as desired.
  •     Add all wording (I Have used a gradient glow on my tag by changing the green glow setting in Eye Candy Impact 5 to a white)
  •     Add all copyrights
  •     Resize tag as desired.
  •     Hide background and mask layers.
  •     Merge Visable (This should merge your elements, tube and wording.)
  •     Hide Elements layer
  •     Unhide bacground and mask layer.
  •     make sure in the layers palette layer you are selected on the mask layer
  •     Go into your Xenofix and apply the following settings: (remember the seed number does not matter right now)
  •     Copy Merged
  •     Paste into Animation Shop as a new animation
  •     **Back in PSP UNDO constellation
  •     Now go back to the Effects panel and redo the effect, hitting the random seed button to change the placement of the stars
  •     Copy Merged
  •     Paste AFTER the current frame** (Redo from ** to **  at least 2 more times.  I will assume you have done it 2 more times for a total of 4 frames for the remainder of this tut)
  •     Back in PSP HIDE Mask and background layers and UNHIDE the tube layer
  •     Copy
  •     Paste into Animation shop as a new animation. Now hit CTRL+L 3x this will give you a total of 4 frames just like the other animation. (If you have more then 4 just add the extras by hitting Ctrl+L once more for each layer)
  •     Now CTRL+A (Select all) Ctrl+C (Copy)
  •     Click on the mask layer
  •     CTRL + A (Select all) and then CTRL+E Paste and click where you would like the layer placed
  •     Run and Save Animation =)

Wednesday, November 3, 2010

Believe

For this tutorial I have used the Christmas Fantasy kit from Tooty Pup HERE
Animation Shop in my quick links above

Open a new 550x550 canvas
Choose a white Christmas tree from the elements 2 folder (I have used 9) and resize it as needed to fit into the blank canvas black drop shadow:. 5, 5, 80, 7
Effects>Artistic Effects> Aged Newspaper 25%.  This should give you a off white tree which is what we need for the image effect to work in animation shop.
Copy Merged
Paste as a new animation in Animation Shop
Right click on the blue bar around your frame in animation shop and choose Insert Image effect.
Select Rotate Colors  You can play with this as you would like.  I have mine at 5 secs and 4fps for a total of 21 frames.  You need to remember how many frames you have for when we go to add the rest of this tag.
Open Mother xmas and resize her about 30% and place her to the right of your tree with the same drop shadow as before.
Open Reindeer of choice (I used 6) and resize about 75% place on left side of tree.
Open presents and resize 50% and place between Mrs C and the reindeer
Open Candy-cane 1 plain, resize 20% and hang on reindeer's nose. Add drop shadow
Open word Art and resize to 10% Paste at the top of your tag
New Raster layer flood filled white, send to the bottom of the tag
Add all copyrights and wording now

OK here is where it can get confusing....
Delete your tree layer (yep that is what I said)
HIDE your white layer
Merge Visible (This should leave you with 2 layers even though you can only see one.  The background [white] and everything else.  Make sure that is correct before you proceed by checking in your layers pallette.)
Copy your background layer and paste as a new animation in Animation shop with your cursor inside the frame press Ctrl+Shft+L until you have 21 frames (if you have the application full screen it will tell you in the bottom right how many frames you have)
Cursor on your Christmas tree animation hit Ctrl +A (select all) and then Ctrl +C (Copy)
Cursor on your Background Ctrl + A and Ctrl + E (Paste in current frame)  BEFORE you click to place the tree make sure it is where you want it in your background.  You can always redo this step if needed.
Back to PSP and Copy the layer with all of your embellishments on it
Paste as a new animation and again make sure you have 21 frames as you did above.
Copy and paste this on top of your background and tree layers, making sure again it is placed where you would like it
resize if you would like
run animation
save.

Tuesday, November 2, 2010

I promise (Animated

Another tag made from the wonderful A Furry Christmas kit from 
Designs by Stina available HERE
enlarge to show animation

Monday, November 1, 2010

Christmas Bauble (Animated)


For this tutorial I have used the following supplies:

A Furry Little Christmas from Designs By Stina available HERE
Animation Shop (found in my quick links at the top of the page)
Sparkle tutorial by Patti which can be found HERE (please do this before the rest of the tutorial)

Once you have done your sparkle tutorial (or you have ones of your own) we are ready to begin.
Remember to save your work often just in case ;)

  • Open a blank canvas 650x650, flood full with the background color of your choice (remember this will be the background color inside of your Christmas bauble)
  • Open bauble 05, copy and paste onto your background layer, as a new layer.  Leave it where it falls.
  • Set transparency to 50%
  • Paste the bauble again as another new layer (this will give you 2)
  • Using your freehand selection tool, feather set to zero, cut out the 'glass' part of the bauble and delete it leaving only the silver hanger part.
  • You should now have a solid silver topper and a transparent bauble.
  • Merge all
  • Using your background eraser, delete every part of your background that is outside the bauble.
  • New raster layer flood filled white
  • Send to bottom
  • Place whatever elements you would like inside your ball on top of the bauble (Shows up better this way)
  • Add wording and copyrights as required
  • Resize as desired
  • Place a few sparkles as you would like them on your image
  • Copy merged
  • Paste as a new animation in Animation Shop
  • ***Back in PSP remove the sparkles
  • Place new sparkles again in different locations
  • Copy Merged
  • Paste after current frame in Animation Shop***
  • Do the steps between the starts at least 2 more times for a total of 4 frames
  • Run Animation
  • Save

Wednesday, October 27, 2010

Give Thanks


For this cute little tutorial I have used the following

Give Thanks from Designs By Stina which can be found HERE
Vix mask Valentine 14 which can be found above
Give Thanks mask made by myself which I have included below.


  • To begin make sure your masks are preloaded into your own masks folder and open up your color palette
  • Open two new canvases 800x800 and flood fill each with a color from the color pallet, I have used the dark green and the brown.
  • Load your mask on to each one and invert if necessary
  • On each canvas you need to go to Layers>Merge>Merge Group
  • Copy your love frame and paste that in the center of your Give Thanks canvas.
  • Using your selection tool set to circle, replace, and a feather of 4 with anti alias checked I want you to place your cursor at 400x400 which is the center of your workspace, and drag it out till you have almost the whole inner circle of the love frame in it.
  • Click on your give thanks layer and hit delete.
  • With your Flood Fill tool, pick another color and put that inside the circle
  • Select None
  • Resize and place whatever embellishments all around the frame as you wish
  • Add all wording and copyright information
  • Resize and save!

Saturday, September 18, 2010

Text & Fly


For this tutorial I have used the "Felt Like Halloween" kit from Designs By Stina found HERE
The font I have used is  Bones found HERE

  • First you need to open your frame of choice.  I have used 07.
  • Using either your freehand selection tool OR your magic wand, select the area INSIDE the frame.
  • Open your background paper, I have used paper 18.  
  • Go to your forground color selection area, pattern, and use the paper you have just opened at bout 50% to flood fill the frame.  
  • By clicking on the frame you can now add a drop shadow if you wish.
  • Open the fence and place the fence across the frame
  • Open tree 01 and resize as needed to fit inside the frame.
  • Open Bat 01 and place behind the tree resized as you wish
  • Open the house and place off to the right
  • Open Witchy Splat and pace her on the tree (poor ol thing!)
  • Now I want you to merge visable.  Resize this down to about 70%
  • Open a transparent 600x600 canvas and place your merged layer inside.
  • Open Grim Reeper 02 and mirror, copy and place on the left hand side of your frame.
  • Open cat and pumpkin, resize and place on the right side.
  • Add all wording and copyrights
  • Resize if needed and save!

Monday, September 13, 2010

Beware! (Animated)


For this tutorial I have used What Lies in Ruins by TootyPup which can be found HERE


Vix Mask Halloween 0905 found in my quick links above (install to your mask folder before starting the tutorial)

Alien Skin Xenofix (found in my quick Links) Have installed before begining)


Pick your background paper of choice (I have used #24) and apply the mask. I have made my mask larger then the paper so I can have more of the center image. Resize 60%

Copy Merged and place on a transparent 800x800 canvas. Strech to make it appear as you would like.

Open Spellbook 4 and resize 50% place on your background canvas

Open Moon 1b and resize 50% and place behind the background layer.

Open Vintage Lamp 7 and resize 50% Place on canvas

Open Poser 2 and place behind Spellbook 4

Resize 60%

Add all wording and copyrights.

Pick which layer you would like to sparkle...I picked the mask layer to make it POP

Open Alien Skin Xenofix Constelation and apply the following (seed does not matter)

Copy Merged to Animation Shop, Paste as a new animation

Back to PSP Undo constelation

Redo constelation hitting the random seed button first, copy merged again and paste after current frame. (do this step once more, you should have 3 frames in your animation this will be the tube layer)

Open New Background paper (I used 25) and resize 50% (Background layer)

Copy and Paste as a new animation in Animation Shop so you have 3 frames (Ctrl+Shft+L twice)

While Clicked on the Tubed layer Ctrl+A to select all and CTRL+C to copy

Click on the background image Ctrl+A, and then CTRL E to paste and then click to drop the image. (if you don't like where you have pasted it, undo and try again)

Run Animation and save!

Sunday, September 12, 2010

But Dadddddy

 For this simple tutorial I have used Wrathchild from Designs By Stina found HERE


Open Paper 7
place Fog on top of paper 7, place as you would like it
Place Rose Bush 1 on each sice (use freehand selection if you want to just use part of it like I have.  Select what you do not want to use and hit delete.)
Place the Tub center bottom and your tube of choice in front of it.
Apply wording nad all copyrights
resize if you would like and save!

Friday, September 10, 2010

Autumn Blessings 2010


  •  For this tutorial I used the DBS (Designs by Stina) part of the FallEver Friends Collab which can be purchased HERE
  •  
  • Start with a 475x475 canvas flood filled with the landscape gradiant and the wet fall leaves texture at 50% scale.  Flatten
  • Open Fence 2 resize 50% copy and paste onto the background layer down at the bottom.  Drop Shadow 3, 3, 100, 8 black
  • Open frame 10. Resize 50%.  Using your freehand selection tool and point to point you are going to cut off the arch of this frame.  Copy the arch and place on the background image, under the fence and resize and reposition as desired.  Add the same drop shadow as before on this.
  • Open leaves.  Resize 60% and place on the left top of the fence (under the fence) Duplicate and place on the top right as well) Merge these 2 layers and drop shadow as above.
  • Open the rest of your elements and resize and add.  (I have used Lab 02, Sign 02, Teddy Friends 02, Butterfly 03,Clock 02 and Deco 02 all at 30% and the medi_lilflutter4 at 50%I also took Autumn leaves resized at 15% to cover the ‘grass’ in my tag.
  • Add all wording and copyrights and you are all done! (do NOT forget if you use the poser IN the kit you MUST credit the poser!!!)

Tuesday, September 7, 2010

I believe in Magic


For this tutorial I have used:
Heartfelt Perfections part of the FallEver Friends Colab kit which you can get HERE
The wonderful artwork of Zindy found HERE
Vix Mask #39: which can be found in my quick links at the top of the page.
Alien Skin Eye Candy 5 Impact Gradient Glow found in my quick links as well.
Words of Magic Word Art from Rachel which you can get HERE


First you will need to add your mask to your masks folder and make sure you have your Alien Skin installed and loaded.
To start you will need to open 2 papers from the kit I have chosen #5 & #7.  7 will be my background paper so you can minimize that for now.
On paper 5 you are going to apply your mask.  Layers > Load/Save Mask > Load mask from disk.  Make sure the only things checked are Source luminance, fit to canvas and Hide all Masks.  Copy Merged
Bring your background back up and paste the new mask layer on this as a new layer.  Adjust as desired.  I have also taken the time to freehand select around the scarecrow and delete the mask covering it.
Next you are going to add your tube and place it where you would like, and use whatever elsements you like around it.  I have used only clipart 1 and the leaves (which I have duplicated and mirrored and placed under my tube.) 
Open your word art and resize.  I believed I used about 15% (because as we all know word art is normally HUGE)  Copy and paste
Now we are going to use our plug-in.  Effects > PlugIN > Eye Candy 5 > Grad. Glow.  I am using the Green Glow setting, and on the basic tab you want the following :  Outside Glow, Mask Selection, 5.00. 100, 100, 100, 65, 100 and pick whatever color you would like by clicking on the bottom box of the slider bar.  I have used a color from one of the leaves because I thought it looked nice.
Add all copyrights, names ect
Resize
Save!

Saturday, July 17, 2010

Choose Already!

This tag was made by me using the Evil Virgin kit by Immortal Dreams found HERE
and the WONDERFUL art of David Deb at Devient Art but you must have permission to use his artwork!

Saturday, July 10, 2010

Born 2B bad

Tag Template by Jillanns Creations\
Designer:  Immortal Dreams
Tagger: Lori W
Kit name: Pimp N Nookie

Friday, July 9, 2010

Fire and Ice

Tag made using Pimp N Nookie by Immortal Dreams and the wonderful art of Keith Garvey. Kit found here:http://www.scrappinbratz.com/shoppe/index.php?main_page=product_info&cPath=19_219&products_id=3930


Pimp N Nookie

These tags were made with the wonderful work of Immortal Dreams in the kit Pimp N NookieImmortal Dreams is having a sale this month so be sure to check it out and get this kit for next to nuffin!

Monday, July 5, 2010

SALE SALE SALE!!!

Monday, June 14, 2010

God Bless (Animated)

Today I have made a tag with the wonderful Independence Day kit by I Don't Give A Scrap which can be found HERE  This kit has been a lot of fun to play with because there are so many ways to use it!

Sunday, June 13, 2010

Stars N Stripes

Today I have made a tag with the wonderful Independence Day kit by I Don't Give A Scrap which can be found HERE 
I also used the wonderful art work of Keith Garvey which can be found in my quick links
Thanks Merrily for the great kit!
XOXO Lori

Thursday, June 10, 2010

Wonderland

Another tag this one is animated a touch from the Wonders of Alice Kit from I Don't Give a Scrap which can be found HERE

Wednesday, June 9, 2010

Always Something

For this adorable tag I have used the Wonders of Alice Kit from I Don't Give A Scrap available HERE 
and the art of Suzanne Woolcott which can be found in my quick links.

I hope you enjoy it because I thought it came out really cute and Merrily thanks so much yet again for the wonderful kit!

Wednesday, June 2, 2010

Night Night

Today I have a tag that I have created using the wonderful kit Sweet Dreams by I Don't Give A Scrap and that kit can be purchased HERE
The art work is a tube from Suzanne Woolcott the link to which can be found in my quick links at the top of the page!