THOUSANDS OF FREE BLOGGER TEMPLATES �

Notice

My Daughter was born on Feb 14, 2010 and she is wonderfully healthy! Thank you for all the wonderful emails about everything. I just wanted to say that for right now since life has gotten so busy I am working mainly on tags and layouts. There will be the occasional tutorial but not as many as before. I am sorry if this causes any problems, but family comes first! I hope this finds all my followers doing well! Blessed Be! ~Lori

Quick Links

These are the Quick Links to my most used supplies =]

PSP
Alien Skin
Vix
Squirlz Water Reflections
Garvey
Gorjuss
Animation Shop

Tuesday, February 24, 2009

Hoppy Easter


For this tutorial I used the wonderful yet freebie kit Egghunt from Cinnamonscraps which can be found HERE
Animation Shop
A little imagination.

Sometimes in a tutorial less is more and with everything included in this scrap kit I will let your imagination run wild. The only instruction I am going to give is for the pinwheel.

  1. After you have your tag pertty much how you want it to appear, and all your copyrights in place add your pinwheel. Copy the tag merged to Animation shop and paste as a new animation.
  2. Go back to PSP and slightly rotate your pinwheel being careful not to move the center.
  3. Copy merged and paste into your animation AFTER the current frame.
  • Continue to do this as many times as you would like for your desired effect, I chose 5 times.
  • Run your animation to make sure it is how you would like it to appear and save as a GIF file.
  • Like I said less can be more and I believe this is one of thise cases, there are so many ideas one could have from this kit. So play around and have a lot of fun! HOPPY EASTER! Blessed Be Ü Lorilynn

Monday, February 23, 2009

Gothic Memories


  • For this tutorial I used the scrap kit 'I LOVE YOU' from Bits and Bobs wich can be found HERE
  • I used mask 177 by VIX which can be found HERE
  • Tube of choice, mine is from the wonderful Christine and you can get her work from joining her mailing list HERE
  • Please select and open your bacground layer..
  • Layers, New Raster Layer, Transparent.
  • Flood fill with the color of your choice, I used grey because it made it more 'spooky' to me
  • Apply the VIX mask 177 to the grey layer
  • Open your tube and place it between the mask layer and the backgrond layer. Adjust transparancy on any of these if you wish. For those that do not know this can be done with the transparancy slide bar in the layers pallett
  • Merge all
  • Add embelisments copyrights, names and drop shadows as you wish.
  • Merge all
  • Save
  • Thank you for your time and I hop0e you had fun with this.

Sunday, February 22, 2009

City of Love


  • For this tutorial I used a skrap kit from AUSSIE SCRAPPERS which can be found HERE.
  • I used the wonderful 'Chubbie' artwork of Farrah Designers Scraps which can be found HERE

  • Open your backgound element and resize if needed, I used the 'Paris Mat' as my background.
  • Resize your tower or use one of your own and place as you would like it.
  • Add other elements and also position as you would like
  • Add your tube of choice
  • Apply a drop shadow to the elements you would like
  • Add copyrights and text.
  • I used the drop shadow effect over and over to highlight my text in diffrent colors, but you could also use Gradiant glow from Alien Skin... Which I have but my son has apparently lost on my computer so I can not install it lol
  • Save your work as a PNG file so as to retain the 'clear background'
  • I hope you enjoyed this tutorial Blessed Be Ü Lorilynn

Spring Storm


For the following Tutorial I used the PTU scrap kit Spring Spirit by Bluedream Designs. You can purchase the kit HERE

I used Alien Skin Xenofix which you can download a trial HERE

I used the AWESOME art work of Keith Garvey which you can get at MyPSPTubes HERE

I used the following masks as well: (I have had these masks for a while before I knew about copyright laws, I have no idea if they were stock with my PSP or not. No harm was intended and if they are yours please let me know so I can give proper credit to you


  • Open all three papers and decide what you want your base and two masks to be made from.
  • Apply each mask to the selected layer.
  • Copy merged each masked layer in the order in which you would like them to appear on top of your base layer.
  • I added two of the clouds in between the two masks. And applied a drop shadow 2, 2, 100, 23 black. I chose black because I love a good spring storm.
  • I used Alien Skin Electrafy on the clouds with the following settings, you can adjust them however you want.

  • I arranged the spring tag and bows in the way I wanted them to appear, along with drop shadows on them.
  • The only other embelishment I used was the butterfly but you can use what ever gives you the effect that you would like.
  • Add your tube of choice with a drop shadow.
  • Add all copyright information and name if desired
  • Resize your tag if desired and save,
  • I hope you enjoyed this Tut! Ü

Saturday, January 31, 2009

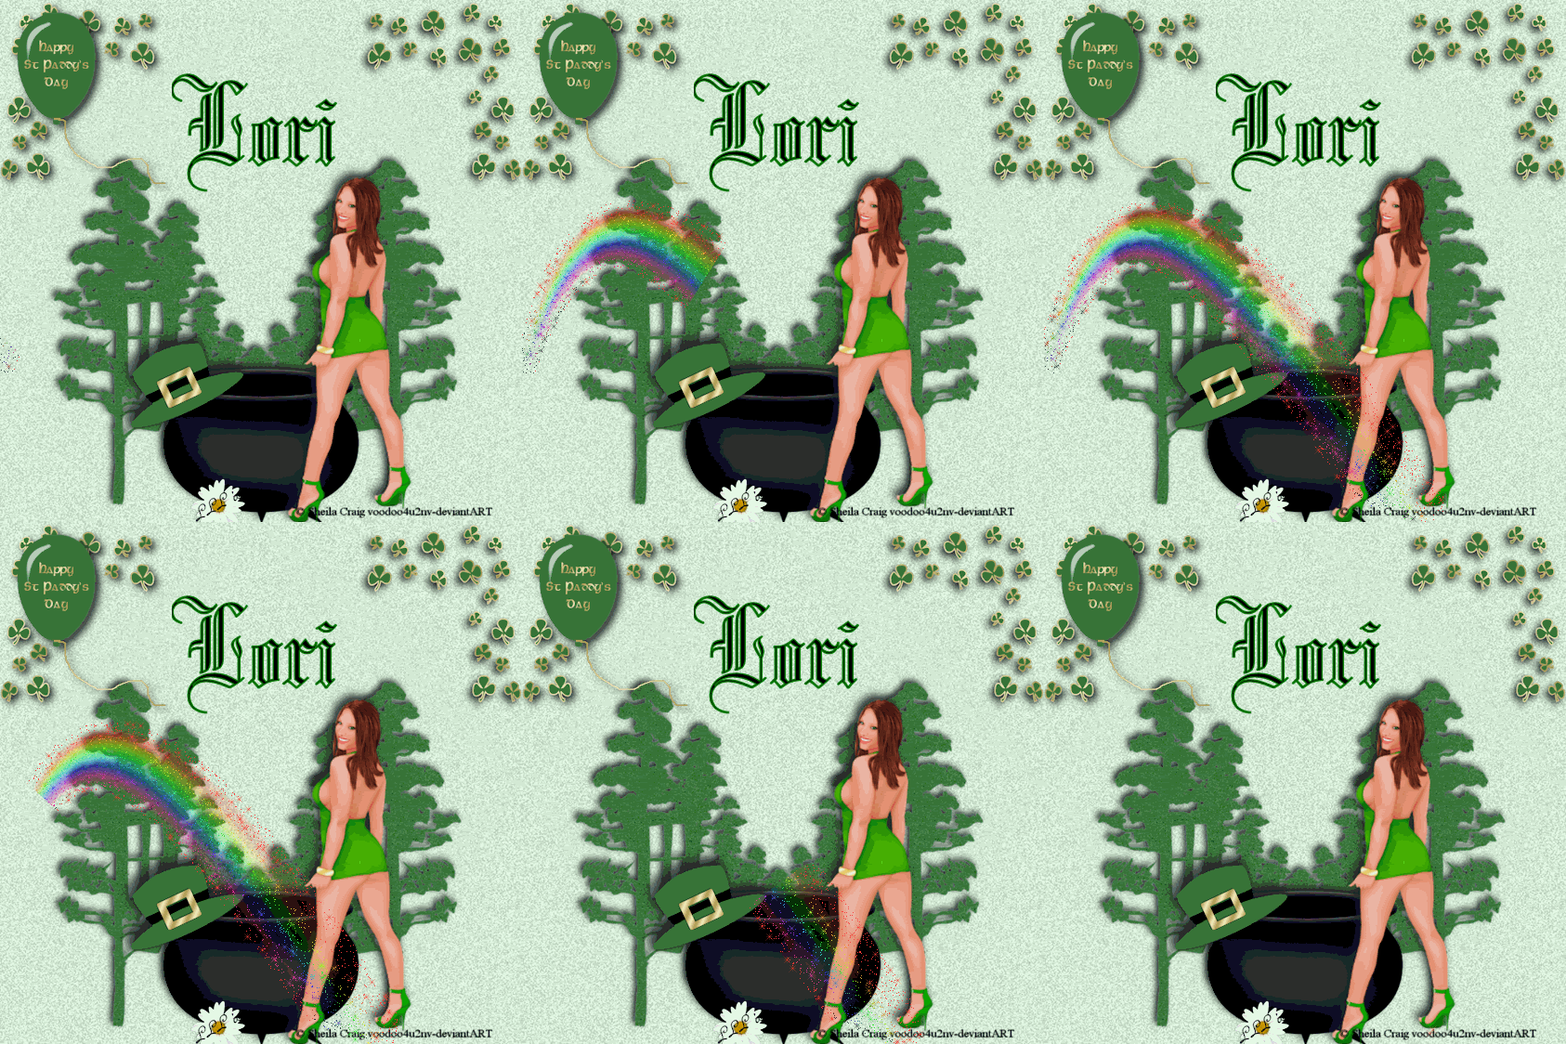
Luck of the Irish (ANIMATED)


  • Luck of the Irish
  • All of my tutorials are written for someone with a working knowledge of PSP. Any resemblance to any other tutorial is purely unintentional.
  • This tut will require PSP (I used X2 but any will do) And Animation Shop.
  • Scrap kit used is Saint Patrick's by Lisa's Designs and is FTU and can be found HERE.
  • Tube is called St Patty and is by voodoo4u2nv@ Deviant art and can be found HERE
  • Mask is VIX_31 and included in supplies.
  • Rainbow is by Night Owl bless her heart you can enjoy her work at www.NiteOwlsRoost.com and the rainbow is also included in my supplies
  • My Supplies can be downloaded HERE
  • Here we go! Remember to save oftin!
  • Open both the light and dark green glitter papers and re size them both to 150%. Add the mask to the paper that you wish to me your trees, Place a drop shadow on the tree layer if you would wish. COPY MERGED and then PASTE to the background layer.
  • Add other embellishments and tube how you would like them, and add drop shadows if you would wish.
  • DO NOT forget all copyrights!!
  • MERGE ALL layers and then lock them.
  • COPY MERGED and transfer to Animation Shop as a new animation. CTRL+SHIFT+L until you have 31 frames in this animation.
  • Open the Rainbow and DELETE the BLACK frame. This should leave you with 31 frames in this animation. While the rainbow is your working animation CTRL+C. MOVE to the tag being your working animation and CTRL+E. DROP it where you would like it. RUN to see the effect you have. If you do not like it you can EDIT, UNDO PASTE and redo it for the effect you would like.
  • Back in PSP add a new raster layer to your tag. On this layer put the name you would like on the tag and make sure it is positioned where you would like it. HIDE the base layer by clicking on the eye in that layer in the layers palette, Now COPY MERGED and paste it over in Animation Shop. Again you need 31 frames of this (CTRL+SHIFT+L) COPY (CTRL+C) and PASTE (CTRL+E) into the tag with the rainbow already on it.
  • Run Animation and save! I hope you had fun with this tut Blessed Be ~Lorilynn

Friday, January 30, 2009

Intoxicated (Animated)


This Tutorial will require Animation shop.
Kit used is bt Lisasdesigns and can be found under 'free kits HERE

  • Pick your paper for your background, you are eventually going to use both versions of the same paper. resize 150%
  • Paste Tube where desired.
  • Drop shadow. I used 20, 20, 100 15.94, black. I did this twice for the effect I wanted.
  • add other embellishments (all either white or black versions) you wish to use with a drop shadow -5,-5, 100 15.94, red AND 5,5,100 15.94, red to give them a glow effect.
  • Add whatever text you would like and make sure it has a thick (I used 4.0) red outline.
  • Save this image as whatever you would like to call it. with a '1' after it.
  • Now open the opposites of everything you had. Resize the paper again to 150% and paste it over the first paper you used. Make sure everything else is still on top of it.
  • Now take the opposites of your embellishments and paste them over the old ones as well. Doing it like this will insure you have them completely covered.
  • On your text go to edit text (from your right click over the text) and change the internal color here as well without changing your outline.
  • Save this as whatever your image name is with a '2'
  • In Animation Shop use the Animation Wizard to make an animation out of frames 1 and 2. Make the duration 40.
  • Back in PSP you are going to make a new raster layer, On this you want to add your copyrights, watermarks, and name if you wish. HIDE all other layers and copy this new layer to Animation shop as a new animation, CTRL+Shift+L to add an additional frame with the same image.
  • CTRL+C on the bar above the raster and CTRL+ E on the bar above the tags, make sure to position properly.
  • Run the animation and save Ü
  • Relax


    Scrap Kit is called Bath Supplies by Jessica, and quite frankly I don't remember which Jessica I got it from so if it is yours please let me know so I can correct this post. Thank you!
    • Open the Wood frame and increase image to 150%
    • Inside the frame paste the background and stretch to fit inside the frame,
    • Add drop shadow to the frame as desired,
    • Use other embellishments to your liking with or without drop shadows.
    • add text and copyrights.