
- November Harvest kit from Gina's Gems available HERE
- Alien Skin Xenofix 2 Constellation Available in quick links
- Alien Skin 5 Impact G radiant Glow Available in quick links
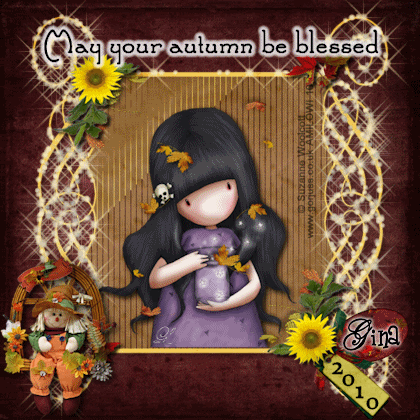
- The Beautiful work of Gorjuss available in my quick links
- Vix Mask 421 available in quick links. Please have this preloaded into your masks folder.
Let us begin,
- First open your background and foreground papers of choice.
- Apply Mask to your foreground paper. Merge Group, Copy and paste onto your background paper.
- Copy and paste your tube where you would like
- Add elements as desired. I have used NH Botanical Flower 4, NH Branch 3, NH Double tag 3, NH Fabric Leaves deco 1 and NH Scarecrow 4. Resize and place as desired.
- Add all wording (I Have used a gradient glow on my tag by changing the green glow setting in Eye Candy Impact 5 to a white)
- Add all copyrights
- Resize tag as desired.
- Hide background and mask layers.
- Merge Visable (This should merge your elements, tube and wording.)
- Hide Elements layer
- Unhide bacground and mask layer.
- make sure in the layers palette layer you are selected on the mask layer
- Go into your Xenofix and apply the following settings: (remember the seed number does not matter right now)

- Copy Merged
- Paste into Animation Shop as a new animation
- **Back in PSP UNDO constellation
- Now go back to the Effects panel and redo the effect, hitting the random seed button to change the placement of the stars
- Copy Merged
- Paste AFTER the current frame** (Redo from ** to ** at least 2 more times. I will assume you have done it 2 more times for a total of 4 frames for the remainder of this tut)
- Back in PSP HIDE Mask and background layers and UNHIDE the tube layer
- Copy
- Paste into Animation shop as a new animation. Now hit CTRL+L 3x this will give you a total of 4 frames just like the other animation. (If you have more then 4 just add the extras by hitting Ctrl+L once more for each layer)
- Now CTRL+A (Select all) Ctrl+C (Copy)
- Click on the mask layer
- CTRL + A (Select all) and then CTRL+E Paste and click where you would like the layer placed
- Run and Save Animation =)


0 comments:
Post a Comment