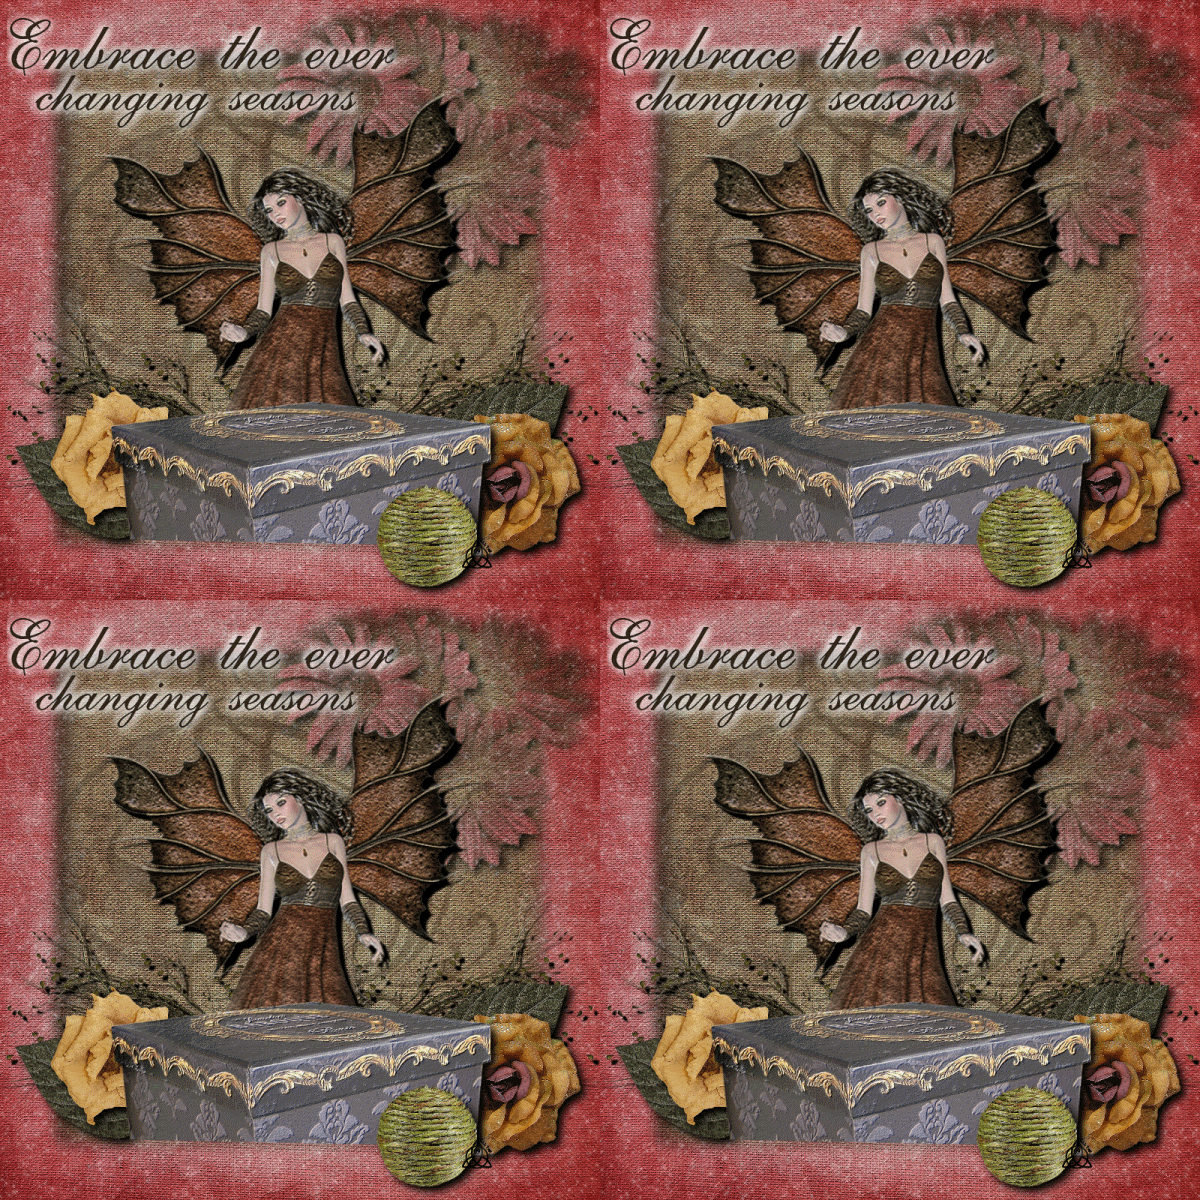
For this tag I used the wonderful work of Vicki from Gemini Creationz called Papyrus which can be found HERE
MASK.. I BELIEVE is Vix, if not and it belongs to you PLEASE let me know and I can correct this oversight.
Animation Shop (Link Above)
Here we go.....
OPEN two papers of choice, background and frame
APPLY mask to Frame paper and COPY MERGED.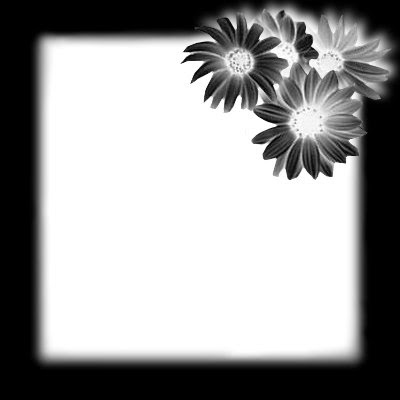
PASTE onto background layer, apply drop shadow if you would like. I used 7, 7, 100, 15 BLACK
I wanted more texture on my background so I used Swirl1 with a transparency of 30
ADD Deco Box
ADD flowers ect around as you would like (drop shadows where you feel you want)
I have my flowers LAYERD as so they pop out of my frame. Adjust as needed.
ADD Tube of choice, I used the beautiful fairy included in the kit thanks Vicki!
RESIZE I did 75%
SELECT Your FRAME layer.
Go to your plug in Alien Skin Xenofex 2 > Constellation The settings I used are as follows using random seed:
COPY MERGED
Go to ANIMATION SHOP
PASTE as new image
BACK TO PSP
***UNDO Constellation. Back to PLUG IN, use diffrent random seed, repeat COPY MERGED and go to Animation shop, paste after selected frame. Do this 2 more times (more or less as you would like)*** Notice How many base layers you have in the bottom right corner
BACK to PSP. Add New Raster Layer.
Apply copyrights
Add any text you would like.
Merge the new layers if there is more then 1... COPY only the new layer (s)
PASTE in Animation shop as a NEW Animation
CTRL+SHFT+L to repete as many times as you have base layers
CTRL+SHFT+A to select all
CTRL+SHFT+C to copy
ON BASE LAYER
CTRL+SHFT+A
CTRL+SHFT+E to paste. Remember if you move your mouse you WILL move the layer. Be careful and do not click until it is where you want it. You can fix this with a simple undo.
RUN and SAVE your New tag!
Friday, July 31, 2009
Embrace
Posted by Lorilynn at 9:47 AM 0 comments
Wednesday, April 22, 2009
Summer Nights

For this tut I used the following
Kit: 'Are We There Yet' from Bits N Bobs found HERE
Animation Shop
Screen Image made by me found HERE
- First open a new image 800x800 filled with one of the sky gradients I used Sky4 with a texture of cobblestone and then flattened the image.
- Open the screen and place it where you would like
- Add the cars, road and what ever images you would like to add from the kit, adding a drop shadow when you would like to. Make the tag look like you would expect a Drive In to look like (Sad thing is most kids today will never even see a drive in)
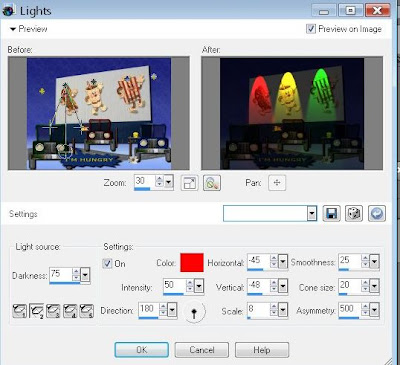
- Effects>Illumination Effects>Lights
- Preset of Traffic Top. You may have to move the lights around a tad to get them on the top of your screen settings are below.
- Add copyright or watermart
- I used a frame for mine, Brushed edges
- Resize to 50%
- Copy Merged to a new 800x800 filled black
- Mine is tilted a bit
- Add text as desired, mine I also used a gradiant glow on
- Merge All
- Add a new raster layer
- Add star tubes as desired
- Copy merged to Animation shop
- Back to PSP
- delete star layer
- Add new raster and make stars again
- Copy Merged and paste in Animation shop after the current frame
- Do this as many times as you desire
- Run
- Save as .gif file
Lorilynn
Posted by Lorilynn at 8:01 PM 0 comments
Time 2 Play
- For this tutorial I used the iPod template from Bits N Bobs which can be found HERE
- I used the wonderful Artword of Keith Garvey which can be found HERE
- I used the plug in Gradient Glow from Eye Candy Impact which can be found HERE
- Animation Shop
- Let's Begin...
- First open your Ipod template. You should see it in several layers. To colorize this what you are going to do is selcect one of the layers in the layers pallett (I am useing the base unit for my preview) With your magic wand click on the base layer. You will see marching Ants around your base.
 . Selections>Float>Defloat. New Raster Layer Blend of OVERLAY. Flood Fill with color/pattern/gradiant of choice. Unslect all. You will do this for every layer you wish to color.
 - RESIZE to about 20% this should make your tag pretty close to 100% which is where you would like it.
- HIDE the screen layer but clicking on the eye next to it in the layers pallet
- MERGE VISABLE (this is to make things easier to find)
- UNHIDE the screen layer.
- Open your tube and place it between the two layers.
- New rater layer
- Add all copyright information now
- New Raster layer
- Add wording for tag and if you want add the gradiant glow now. Have fun with it, whatever you want.
- If you want your tag NON ANIMATED this is where you STOP and SAVE your tag
- ANIMATED TAG
- COPY MERGED and paste as a new animation in Animation shop
- BACK to PSP
- This is where you can change your tube or text by deleting the corasponding layers. Each time you do this add a new Raster layer to replace the old one and use one for the text, tube what ever you would like to replace.
- COPY MERGED and then in Animation shop PASTE after current frame. You are going to want to do everything under copy merged for each new frame you would like. I had 4 because I used 4 diffrent tubes.
- RUN your animation. This is where you decide if you would like to slow it down. I always do for things like this So CTRL+A to select all and go to ANIMATION>Frame Properties I usually use about a 65 for pics and a 100 for words, so since this one had both I went with 100.
- RUN your animation again
- SAVE as a .gif
- Hope you enjoyed learning how to colorize a template as well as working on some animation again.
- Happy Earth Day and Blessed Be
- Lorilynn
Posted by Lorilynn at 9:00 AM 0 comments
Saturday, April 4, 2009
Not your ordanary DIVA
- For this tag I used the kit Diva-licious from Bits N Bobs and that can be found HERE
- I used the artwork of one of my fav artests Keith Garvey the tube is called Goth Chick and can be found at MyPSPTubes HERE
- First pick your background layer or open a blank 900X900 raster layer.
- OPEN each of the fancy feathers. Place them in a design of your liking. I placed one on each side of my paper making a rectangular frame, merged them, and then duplicated and mirored or fliped as needed.
- Hide background if you have one and MERGE VISABLE
- DROP SHADOW 7,7,100, 10
- ADD Butterfly charm. I recolored to the darkest purple at 100% I also applied a drop shadow to this.
- ADD other embelisments and charms as desired with or without drop.
- PLACE your tube where you would like it.--- For mine I wanted it to pop out of the frame so I placed my tube right on top of my frame, zoomed in and used my free hand to select around her head in any areas the frame was covering. I made sure I had the frame layer selected and hit CUT.
- ARANGE the tune UNDER the frame layer after you have done this.
- ADD names and coptrights.
- COPY MERGED
- PASTE as six new layers, adding a flare to each diamond in the heart and one to an eye
- COPY each frame to Animation Shop
- Run animation and SAVE
- Blessed Be Friends ~Lorilynn
Posted by Lorilynn at 3:59 PM 0 comments
Saturday, March 28, 2009
Easter Bunny
- For this tutorial I used:
- The wonderful scrapkit Easter Egg Hunt by Vicki and it can be found HERE
- Eye Candy 5 Impact *Glass* which you can find for demo with install instructions HERE
- Animation Shop
- PSP X2
- Lets get started...
- OPEN your background paper of choice and resize as desired.
- OPEN felt egg row and PASTE at the left side of your paper. DUPLICATE, MIRROR
- On the origional egg row rotate it left or right does not matter. PASTE to the top of your paper, DUPLICATE, Mirror... this should give you a frame of the felt eggs.
- HIDE your paper layer and MERGE VISABLE.
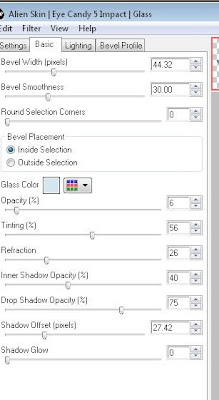
- Now go to your Plugin GLASS and use these settings:
- UNHIDE your paper layer.
- Add your fence, bunny of choice, and other elements and names with or without drop shadows as you would wish. I also added the glass effect to my Easter banner and the name.
- Add Copyrights and watermarks
- RESIZE
- STOP here if you do not want the butterfly animation and save your tag
- If you would liek to add the butterfly (and we all know I love butterflies) resize it and paste it on one side of your tag.
- COPY MERGED and PASTE into Animation Shop as a new animation.
- Go back and slightly move your butterfly. repeate above but paste after current frame.
- Continue until you have the butterfly all the way across the tag.
- RUN
- SAVE
- Hope you liked this one... Thanks Vicki for adding me to your team! Blessed Be all... Lorilynn
Posted by Lorilynn at 3:31 PM 0 comments
Tuesday, February 24, 2009
Hoppy Easter

For this tutorial I used the wonderful yet freebie kit Egghunt from Cinnamonscraps which can be found HERE
Animation Shop
A little imagination.
Sometimes in a tutorial less is more and with everything included in this scrap kit I will let your imagination run wild. The only instruction I am going to give is for the pinwheel.
- After you have your tag pertty much how you want it to appear, and all your copyrights in place add your pinwheel. Copy the tag merged to Animation shop and paste as a new animation.
- Go back to PSP and slightly rotate your pinwheel being careful not to move the center.
- Copy merged and paste into your animation AFTER the current frame.
- Continue to do this as many times as you would like for your desired effect, I chose 5 times.
- Run your animation to make sure it is how you would like it to appear and save as a GIF file.
- Like I said less can be more and I believe this is one of thise cases, there are so many ideas one could have from this kit. So play around and have a lot of fun! HOPPY EASTER! Blessed Be Ü Lorilynn
Posted by Lorilynn at 3:05 AM 0 comments
Saturday, January 31, 2009
Luck of the Irish (ANIMATED)
- Luck of the Irish
- All of my tutorials are written for someone with a working knowledge of PSP. Any resemblance to any other tutorial is purely unintentional.
- This tut will require PSP (I used X2 but any will do) And Animation Shop.
- Scrap kit used is Saint Patrick's by Lisa's Designs and is FTU and can be found HERE.
- Tube is called St Patty and is by voodoo4u2nv@ Deviant art and can be found HERE
- Mask is VIX_31 and included in supplies.
- Rainbow is by Night Owl bless her heart you can enjoy her work at www.NiteOwlsRoost.com and the rainbow is also included in my supplies
- My Supplies can be downloaded HERE
- Here we go! Remember to save oftin!
- Open both the light and dark green glitter papers and re size them both to 150%. Add the mask to the paper that you wish to me your trees, Place a drop shadow on the tree layer if you would wish. COPY MERGED and then PASTE to the background layer.
- Add other embellishments and tube how you would like them, and add drop shadows if you would wish.
- DO NOT forget all copyrights!!
- MERGE ALL layers and then lock them.
- COPY MERGED and transfer to Animation Shop as a new animation. CTRL+SHIFT+L until you have 31 frames in this animation.
- Open the Rainbow and DELETE the BLACK frame. This should leave you with 31 frames in this animation. While the rainbow is your working animation CTRL+C. MOVE to the tag being your working animation and CTRL+E. DROP it where you would like it. RUN to see the effect you have. If you do not like it you can EDIT, UNDO PASTE and redo it for the effect you would like.
- Back in PSP add a new raster layer to your tag. On this layer put the name you would like on the tag and make sure it is positioned where you would like it. HIDE the base layer by clicking on the eye in that layer in the layers palette, Now COPY MERGED and paste it over in Animation Shop. Again you need 31 frames of this (CTRL+SHIFT+L) COPY (CTRL+C) and PASTE (CTRL+E) into the tag with the rainbow already on it.
- Run Animation and save! I hope you had fun with this tut Blessed Be ~Lorilynn
Posted by Lorilynn at 11:27 AM 0 comments
Labels: ANIMATED, Lisa's Designs, VooDoo
Friday, January 30, 2009
Intoxicated (Animated)
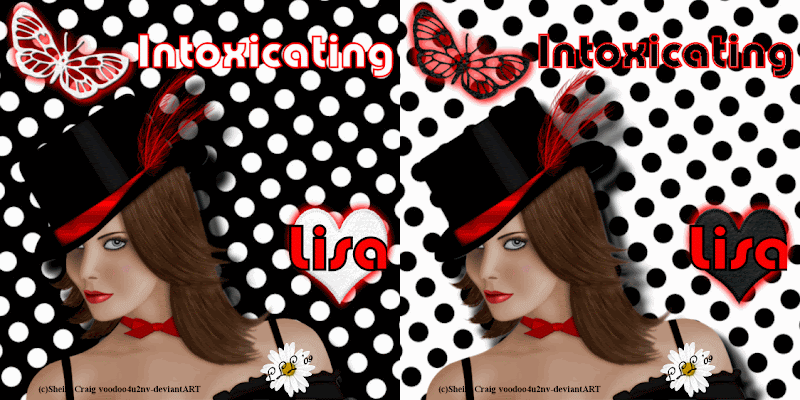
This Tutorial will require Animation shop.
Kit used is bt Lisasdesigns and can be found under 'free kits HERE
Posted by Lorilynn at 6:56 PM 0 comments
Labels: ANIMATED, Lisa's Designs, VooDoo
Thursday, January 29, 2009
Date Night (Animated)
Tutorials are written for someone with a working knowledge of PSP. All Tutorials are made by me any resemblance to any other tut is purely coincidental and unintended. Remember to save often as you go!
- Paint Shop Pro (I have 2x but any will do)
- Alien Skin Xenofex
- Animation Shop
- Scrap kit Hearts Desire by Yvette found here
- I used the artwork of Keith Garvey which you must have a licence for and can be purchased here
- Open a transparent canvas 700x700.
- If you would like a background picture on this please feel free to add it now.
- Open and paste one of the envelops on the canvas and position it to your liking. Add drop shadow 8, 8, black, 100, 27.
- Arrange roses and branches how you would like. Add drop shadow.
- Add Ticket Stubs and other embellishments as you wish.
- Add Tube and place Under the envelope as desired.
- Make sure you add all copyrights to your work.
- Copy merged and paste as three (3) new images.
- Using Alien Skin Xenofex 2 Constellation apply the follorwing settings (you can tweak them for the effect you would like)
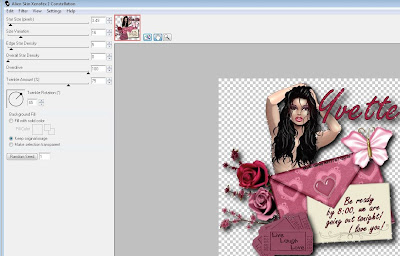
- Do this with a random seed on all three layers
- Copy the first layer and paste as a new animation in Animation Shop, then copy and paste each additional layer after it.
- Run the file and save!
Posted by Lorilynn at 8:33 AM 0 comments

