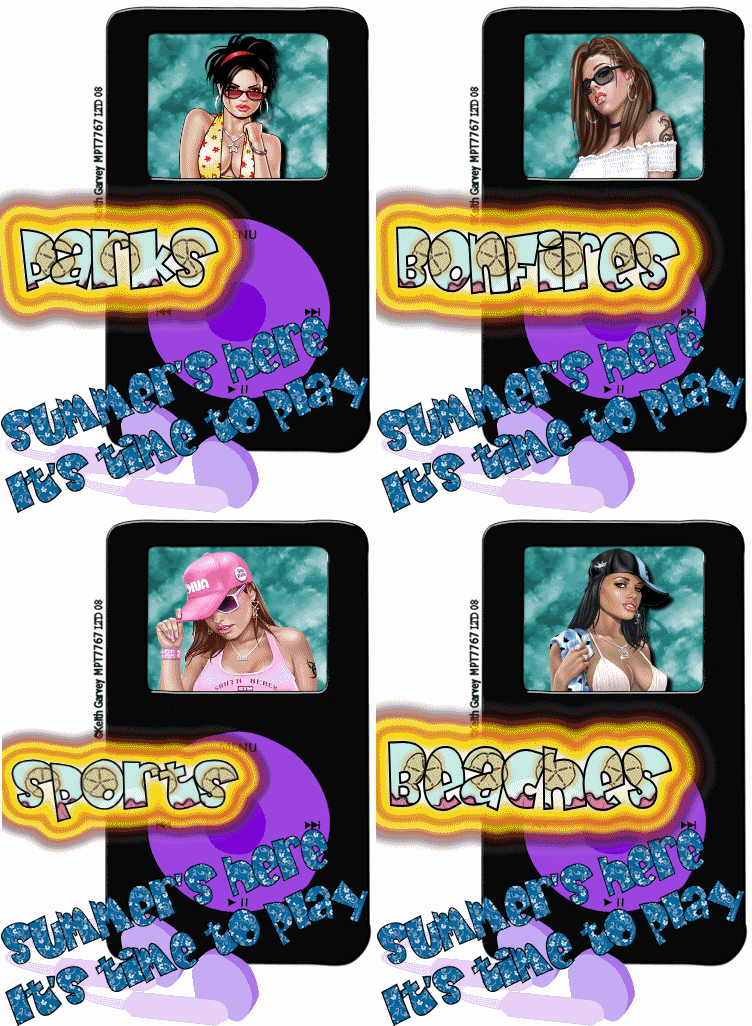
- For this tutorial I used the iPod template from Bits N Bobs which can be found HERE
- I used the wonderful Artword of Keith Garvey which can be found HERE
- I used the plug in Gradient Glow from Eye Candy Impact which can be found HERE
- Animation Shop
- Let's Begin...
- First open your Ipod template. You should see it in several layers. To colorize this what you are going to do is selcect one of the layers in the layers pallett (I am useing the base unit for my preview) With your magic wand click on the base layer. You will see marching Ants around your base.
 . Selections>Float>Defloat. New Raster Layer Blend of OVERLAY. Flood Fill with color/pattern/gradiant of choice. Unslect all. You will do this for every layer you wish to color.
 - RESIZE to about 20% this should make your tag pretty close to 100% which is where you would like it.
- HIDE the screen layer but clicking on the eye next to it in the layers pallet
- MERGE VISABLE (this is to make things easier to find)
- UNHIDE the screen layer.
- Open your tube and place it between the two layers.
- New rater layer
- Add all copyright information now
- New Raster layer
- Add wording for tag and if you want add the gradiant glow now. Have fun with it, whatever you want.
- If you want your tag NON ANIMATED this is where you STOP and SAVE your tag
- ANIMATED TAG
- COPY MERGED and paste as a new animation in Animation shop
- BACK to PSP
- This is where you can change your tube or text by deleting the corasponding layers. Each time you do this add a new Raster layer to replace the old one and use one for the text, tube what ever you would like to replace.
- COPY MERGED and then in Animation shop PASTE after current frame. You are going to want to do everything under copy merged for each new frame you would like. I had 4 because I used 4 diffrent tubes.
- RUN your animation. This is where you decide if you would like to slow it down. I always do for things like this So CTRL+A to select all and go to ANIMATION>Frame Properties I usually use about a 65 for pics and a 100 for words, so since this one had both I went with 100.
- RUN your animation again
- SAVE as a .gif
- Hope you enjoyed learning how to colorize a template as well as working on some animation again.
- Happy Earth Day and Blessed Be
- Lorilynn
Wednesday, April 22, 2009
Time 2 Play
Posted by Lorilynn at 9:00 AM 0 comments
Saturday, April 4, 2009
Not your ordanary DIVA
- For this tag I used the kit Diva-licious from Bits N Bobs and that can be found HERE
- I used the artwork of one of my fav artests Keith Garvey the tube is called Goth Chick and can be found at MyPSPTubes HERE
- First pick your background layer or open a blank 900X900 raster layer.
- OPEN each of the fancy feathers. Place them in a design of your liking. I placed one on each side of my paper making a rectangular frame, merged them, and then duplicated and mirored or fliped as needed.
- Hide background if you have one and MERGE VISABLE
- DROP SHADOW 7,7,100, 10
- ADD Butterfly charm. I recolored to the darkest purple at 100% I also applied a drop shadow to this.
- ADD other embelisments and charms as desired with or without drop.
- PLACE your tube where you would like it.--- For mine I wanted it to pop out of the frame so I placed my tube right on top of my frame, zoomed in and used my free hand to select around her head in any areas the frame was covering. I made sure I had the frame layer selected and hit CUT.
- ARANGE the tune UNDER the frame layer after you have done this.
- ADD names and coptrights.
- COPY MERGED
- PASTE as six new layers, adding a flare to each diamond in the heart and one to an eye
- COPY each frame to Animation Shop
- Run animation and SAVE
- Blessed Be Friends ~Lorilynn
Posted by Lorilynn at 3:59 PM 0 comments
Saturday, March 28, 2009
Groovy Baby
- For the following kit I used:
- Animation Shop
- Groovylicious Kit (which is a great freebie right now) By Vicki which can be found HERE
- Tubes are by Keith Garvey and are PTU and can be bought at MyPspTubes HERE
- Lets begin..
- First pick your background paper of choice. I picked the polka dot one because it fit my mood at the moment.
- Resize this to a workable size for your tag.
- Add a new transparent raster layer... COPY the raster layer and PASTE as a new image in your work space and minimize your background paper.
- Open the frame and PASTE into your transparent layer and RESIZE as needed.
- PASTE embellishments however you would like.
- Add your tubes inside the frames and crop/resize as needed.
- ADD drop shadows as desired
- Remember your copyrights and your watermarks.
- Re-open your background layer that you had minimized, COPY MERGED and PASTE as a new Animation in Animation shop.
- Right click on the blue bar around your paper, and Insert Image Effect."Rotate Colors" I used 1.5 and 14 fps.
- Depending on your settings you will have a different amount of frames, which it will show you in the bottom right corner. Mine has 22 frames.
- Go back to PSP and COPY MERGED your frame layer.
- PASTE this into animation shope and press CTRL+SHFT+L 21 times, or however any frames you need minus one.
- CTRL+A to select all frames, CTRL+C to copy
- move to the background paper... CTRL+A and CTRL+E to PASTE
- Run the animation and save as a .gif
- I hope you enjoyed... Blessed Be Lorilynn
Posted by Lorilynn at 3:26 AM 0 comments
Friday, March 27, 2009
Butterfly Blues
- For this tutorial I used the wonderful work of Rachel in a kit called Blue Denum. The kit can be found HERE
- I also used the wonderful artwork of Keith Garvey and you can find all his tubes (all are PTU) at Mypsptubes HERE
- I used a butterfly wing dmsk, I am unsure where I got this from, if it is yours PLEASE let me know and I will give you credit as soon as I get your mail.
- Lets get started.....
- First you will want to pick two papers for the kit, one for your background and one for the butterfly wings.
- Apply the mask below to the butterfly wing paper and then paste it on to your background paper.

- Add your tube and resize or tweek the position as you would like it.
- Apply a drop shadow if desired.
- At this point I merged my tube and wing layers just to make life easier as I went in case they needed resized again.
- PIck a frame of choice, I liked the square one best but whatever you want it's your tag after all Ü
- Apply a slight drop shadow, I used 5, 5, 100, black.
- Add embelishments, and word art as you would like, and shadows.
- Remember all copyrights and your mark!!
- Resize and save.
- Hope you enjoyed and blessed be... Lorilynn Ü
Posted by Lorilynn at 3:14 AM 0 comments
Thursday, March 12, 2009
Spring Training
- For this tutorial I used the kit Spring Spirit from Bel Vidotti Scraps which can be found HERE
- My Tube of choice was by Keith Garvey and you can purchase her HERE
- The mask I have used is included below I *Think* it was PSP stock, if not and you happen to know where I need to link back for it please let me know and I will get this corrected ASAP!
- Lets Begin...
- Pick a paper of choice from the ones provided, and apply the mask, or one of your liking. Apply drop shadow if desired. Mine was 8,8,100, 20, black.

- Add the tag of choice, position, resize and drop shadow as desired.
- I made my flower arangment of 3 tulips as well as the big blue daisy and greenery, all with drop shadows. You can make yours as desired. Also you can add any other embelishments you may want to use.
- Add your tube of choice. With mine I wanted it to appear she was coming out of the tag so I added her above my bow but under my butterfly. I added my drop shadow, and then useing the circle selection I croped everything off from around the tag to get the effect I wanted.
- Add your copyrights & signatures
- Add and wording or names you may want
- Resize if desired
- Save as a ONG for transparent background or as jpg for a white background.
- Hope you enjoyed. Blessed Be Lorilynn
Posted by Lorilynn at 7:47 AM 0 comments
Labels: Bel Vidotti, GARVEY
Friday, March 6, 2009
Give It
- For this tag I used the scrap work of Yvette, its called GirlzRock and you can find it HERE
- I also used the artwork of the very talented Keith Garvey which can be found HERE
- Lets begin
- Open 2 papers of choice, your back and forground.
- Apply mask of choice to the forground paper, COPY MERGED and paste over the background paper
- Add Tube of choice with a drop shadow
- Embelishments as you would like. I kept it simple a skull and the tag.
- On the skull I changed the transparancy to 65% so as to make it blend into the backgound easier
- Add text phrase of choice
- Add name to the name tag
- Inner Bevel

- Drop Shadow

- resize
- save!
Posted by Lorilynn at 8:47 AM 0 comments
Sunday, February 22, 2009
Spring Storm

For the following Tutorial I used the PTU scrap kit Spring Spirit by Bluedream Designs. You can purchase the kit HERE
I used Alien Skin Xenofix which you can download a trial HERE
I used the AWESOME art work of Keith Garvey which you can get at MyPSPTubes HERE
I used the following masks as well: (I have had these masks for a while before I knew about copyright laws, I have no idea if they were stock with my PSP or not. No harm was intended and if they are yours please let me know so I can give proper credit to you

- Open all three papers and decide what you want your base and two masks to be made from.
- Apply each mask to the selected layer.
- Copy merged each masked layer in the order in which you would like them to appear on top of your base layer.
- I added two of the clouds in between the two masks. And applied a drop shadow 2, 2, 100, 23 black. I chose black because I love a good spring storm.
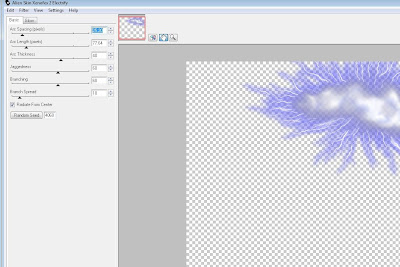
- I used Alien Skin Electrafy on the clouds with the following settings, you can adjust them however you want.

- I arranged the spring tag and bows in the way I wanted them to appear, along with drop shadows on them.
- The only other embelishment I used was the butterfly but you can use what ever gives you the effect that you would like.
- Add your tube of choice with a drop shadow.
- Add all copyright information and name if desired
- Resize your tag if desired and save,
- I hope you enjoyed this Tut! Ü
Posted by Lorilynn at 6:24 AM 0 comments
Thursday, January 29, 2009
Date Night (Animated)
Tutorials are written for someone with a working knowledge of PSP. All Tutorials are made by me any resemblance to any other tut is purely coincidental and unintended. Remember to save often as you go!
- Paint Shop Pro (I have 2x but any will do)
- Alien Skin Xenofex
- Animation Shop
- Scrap kit Hearts Desire by Yvette found here
- I used the artwork of Keith Garvey which you must have a licence for and can be purchased here
- Open a transparent canvas 700x700.
- If you would like a background picture on this please feel free to add it now.
- Open and paste one of the envelops on the canvas and position it to your liking. Add drop shadow 8, 8, black, 100, 27.
- Arrange roses and branches how you would like. Add drop shadow.
- Add Ticket Stubs and other embellishments as you wish.
- Add Tube and place Under the envelope as desired.
- Make sure you add all copyrights to your work.
- Copy merged and paste as three (3) new images.
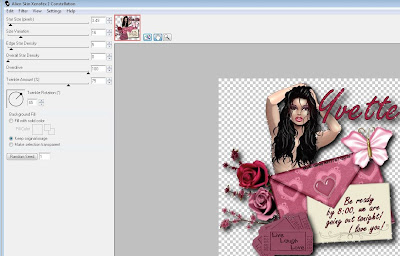
- Using Alien Skin Xenofex 2 Constellation apply the follorwing settings (you can tweak them for the effect you would like)

- Do this with a random seed on all three layers
- Copy the first layer and paste as a new animation in Animation Shop, then copy and paste each additional layer after it.
- Run the file and save!
Posted by Lorilynn at 8:33 AM 0 comments


