- For this tutorial I used the Summer Spritzer kit from Bits N Bobs found HERE
- Animation Shop
- Here we go
- First open a 600x600 canvas with the background color of your choice. I am a fan of purple as always but what ever you want and what works for what you have in mind.
- Using the Vines (Element-4) I have created a base by duplicating the vines and rotating 90 degrees, each of 3 times (for a total of 4)
- On top of that base I created a frame type layer useing the flowers. In another version I used the bling strings, so what ever works, just make a frame from them by rotating.
- Between the two I placed a frame of the feathers for some added color.
- I have used a mist by Christine for my tube, if this is your photography please let me know and I will give proper credit for it.
- Next you are going to want to open your Kite. I have recolored mine just a touch useing Effects>Photo Effects > Film and Filters. I used 85 and a dark purple to get the light purple I have.
- Place the Kite where you would like it to start.
- COPY MERGED
- In Animation Shop PASTE as new animation
- ******
- BACK to PSP
- Move your Kite to the 2nd position
- COPY MERGED
- Back to Animation Shop
- PASTE AFTER CURRENT FRAME
- ******
- Repete inside the ****** as many times as you would like to get the kite to follow the path you desire. Make note of how many frames you have.
- Leave this all open and go back to PSP
- On your tag LAYERS>NEW RASTER>Normal, 100, 0
- On this layer you are going to place your text, watermarks, copyrights ect. Make sure it is all on this one layer by Merging Down when you are done with your text. (A good way to make sure that is all you have on this layer is to hide all text and watermarks by using the eye in the layers pallet on each layer... then merge visible so all you have is your text.)
- While you are selected on the new text layer, COPY (DO NOT COPY MERGED!!!)
- In Animation Shop PASTE AS NEW ANIMATION
- CTRL+SHIFT+L to repete the frame as many times as you need it (I needed 6)
- CTRL+SHFT+A (select all)
- CTRL+SHFT+C (Copy)
- Go to your OTHER (Tag) Frames
- CTRL+SHFT+A (Select all)
- CTRL+SHFT+E (Paste)
- RUN your Animation
- SAVE as .gif file.
Wednesday, August 19, 2009
Summer Dreams
Posted by Lorilynn at 4:44 PM 0 comments
Labels: BNB
Tuesday, August 11, 2009
God's Art

For this tutorial I used the 'An Autumn Romance' Kit from Gemini Creationz found HERE
Two beautiful tubes that are PTU from Suzanne Woolcott found HERE
VIX mask #39 & 109 Found HERE (Ohhh the goodies on this site!)
Animation Shop
- Let's begin
- First you are going to want to pick three papers. I have the brown, orange and green for my tag.
- With your middle color paper apply the 109 mask COPY and PASTE as a new layer on your backgound paper, I applied mine twice for a bolder effect.
- Now with your foreground paper you are going to apply the 39 mask, COPY & PASTE on top of your other papers.... and to make the words stand out a bit, I did a 3,3, 100, 24 black drop shadow.
- This is where you get creative, I know you are going to chage things up a bit, I used the tree, bench and squirrle from the kit because they worked with what I wanted. I applied drop shadows to everything to make it all pop. And I added my gorjuss girls.
- After you add your wording, and copyrights you want to MERGE ALL
- Now for the Animation.
- I am sure there are other ways to do this, but I stick with what I am comfy with so here we go.
- OPEN a new image about 400x400 transparent. I did this 3x because I wanted 3 diffrent leaves.
- Useing the included picture tubes "Autumn leaves" I played around till I found three that I liked, one on each transparent image.
- With each one you are going to want to COPY and then PASTE them on your tag. You can resize them and rotate them as you would like.
- *****
- On this image you are going to COPY MERGED
- In Animation shop you PASTE AS NEW ANIMATION
- BACK TO PSP
- Move your leaves around, rotate them or what ever you would like and move them down the image.
- COPY MERGED
- ANIMATION SHOP
- PASTE AFTER SELECTED FRAME
- *****
- Do everything between the *** as many times as you would like for your effect. I used 4 frames.
- In Animation shop while clicked on your frames hit CTRL+A Then under ANIMATION you can resize if you would like (I used 70%) and you can go to FRAME PROPERTIES and change the speed. I up'ed mine to 40
- RUN
- SAVE AS GIF
- There you go! I hope you had fun tonight =] Blessed Be dear friends and be sure to leave comments!
Posted by Lorilynn at 6:59 PM 0 comments
Tuesday, August 4, 2009
Color Effects Lesson

Today we are going to have a little bit of fun with different effects that are preloaded with your PSP.
I am useing the Papyrus Kit from Gemini Creationz found HERE
A picture taken by my wonderful friend Tanya Townsend which I can not share, but I am sure you can find one of your own that will work.
Lets begin.
First open your picture of choice. Make sure it is a decent size and fits whatever saying you would like to add to it.
Under EFFECTS>PHOTO EFFECTS>TIME MACHINE I used the first one, over 1839 with a 30% intensity with the photo edges ticked. This will give you your 'frame and color effects' If you would like you can play around with this to see what else you can come up with. There are some that are very pretty!
Next for to LAYERS>NEW RASTER LAYER. Normal, 100 and zero, layer is visable. Hit OK
Click on the window for this and then COPY
PASTE as new image on your workspace. (This will give you the correct size for your new images and make the additions a bit simpler.)
Now is when you allow your imagination to have some fun. Use whatever elements you would like to have around your picture. I used the flowers and the leaves and made sure each peice was in its own layer.
Once I had it looking how I wanted it to I went to EFFECTS>PHOTP EFFECTS>SEPIA TONE. Amount to age 60% This will give it all a very close effect to what the time machine did. If you played with the time machine you will need to adjust this up or down as the case may be for the effect you would like.
Now to add some color.
I picked a few of my elements and decided to color them to make them pop. To do this, I selected the element I wanted (Blue flower in the center for example) EFFECTS>PHOTO EFFECTS>FILM & FILTERS. Blue 87%. You can adjust these up and down as you would like. PIck a few and make them all diffrent colors.
Add any text or copyrights you may need. Resize and SAVE!
I hope you had fun learning some color effects today! Have a great week!
Blessed Be
Lorilynn Ü
Posted by Lorilynn at 2:16 PM 0 comments
Friday, July 31, 2009
Summer Memories Frame
For this layout (pic frame) I used the wonderful Strawberry Hill kit by Vicki at Gemini Creationz found HERE
- This is my first layout so it is fairly simple but I am kind of proud so here we go =]
- Open your paper of choice. I liked the Blue.
- Paste your frame of choice on the paper (drop shadow if you would like)
- ADD whatever embellishments you would like (Drop Shadow)
- If you have added tubes remember your copyrights as well as your watermark.
- promote background layer to a raster layer
- Add new raster layer transparent
- Useing your freehand selection tool and point to point,feather zero, cut along the frame. delete. Now you should see your transparent background in the center of your frame.
- RESIZE AND SAVE AS PNG. If you do not save this as a PNG you will not be able to add pictures later.
- Simple but like I said I am proud =]
Posted by Lorilynn at 10:16 AM 0 comments
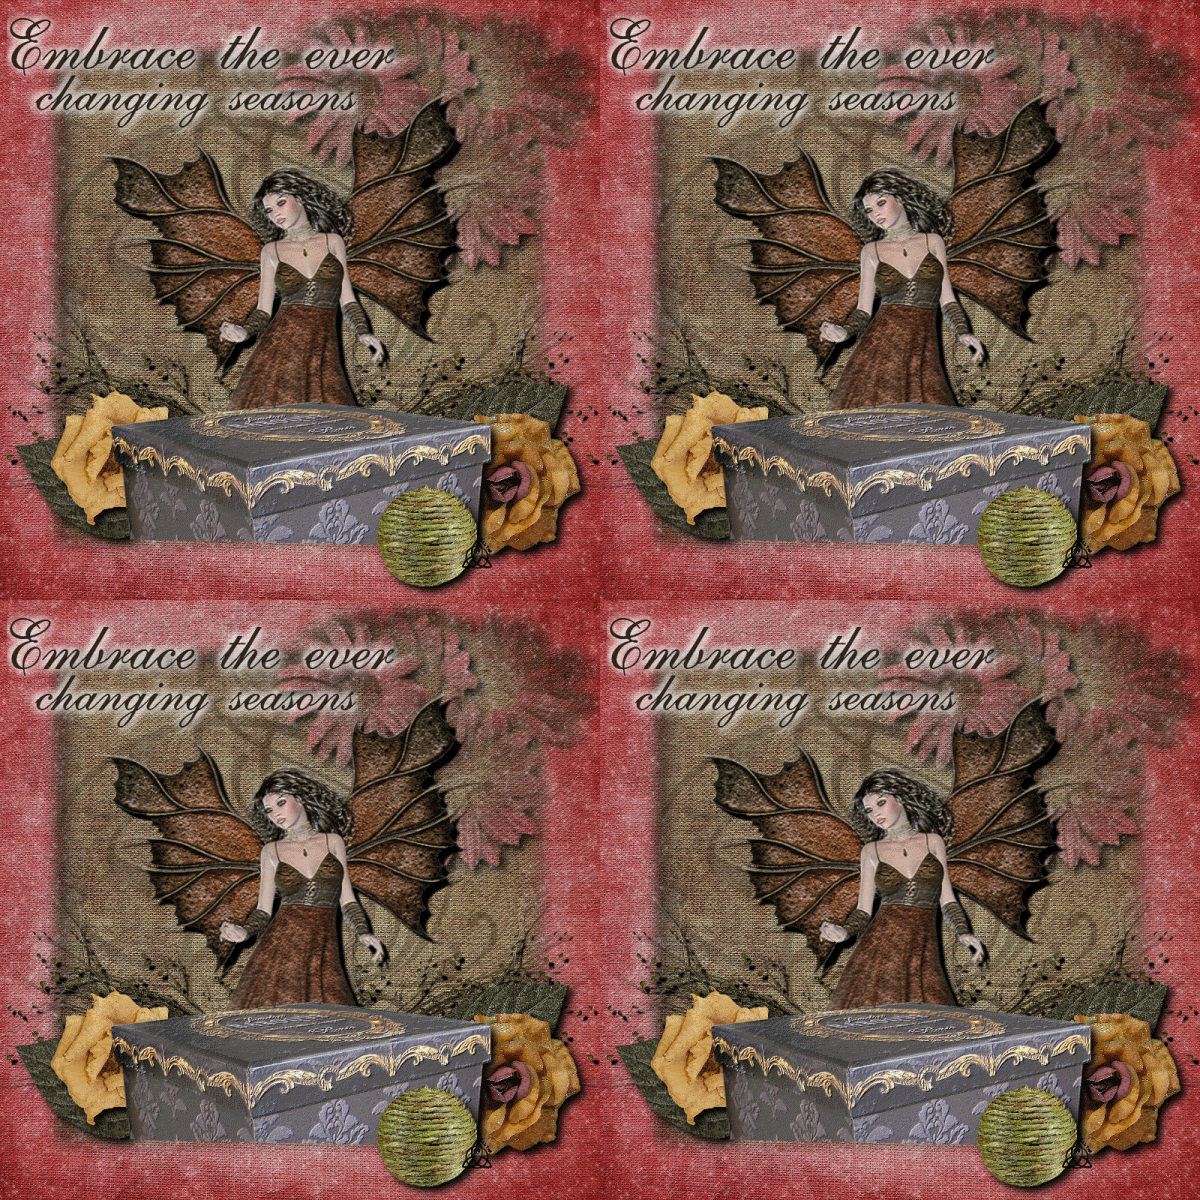
Embrace

For this tag I used the wonderful work of Vicki from Gemini Creationz called Papyrus which can be found HERE
MASK.. I BELIEVE is Vix, if not and it belongs to you PLEASE let me know and I can correct this oversight.
Animation Shop (Link Above)
Here we go.....
OPEN two papers of choice, background and frame
APPLY mask to Frame paper and COPY MERGED.
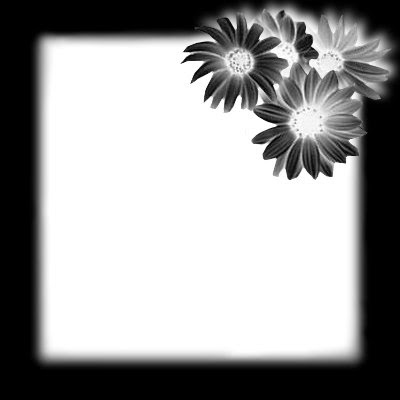
PASTE onto background layer, apply drop shadow if you would like. I used 7, 7, 100, 15 BLACK
I wanted more texture on my background so I used Swirl1 with a transparency of 30
ADD Deco Box
ADD flowers ect around as you would like (drop shadows where you feel you want)
I have my flowers LAYERD as so they pop out of my frame. Adjust as needed.
ADD Tube of choice, I used the beautiful fairy included in the kit thanks Vicki!
RESIZE I did 75%
SELECT Your FRAME layer.
Go to your plug in Alien Skin Xenofex 2 > Constellation The settings I used are as follows using random seed:
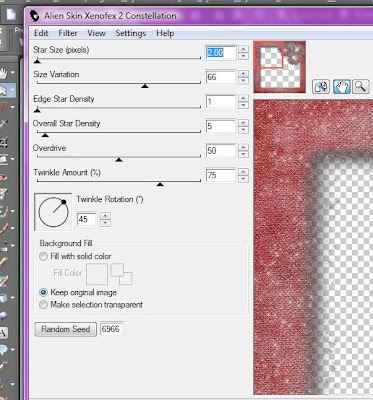
COPY MERGED
Go to ANIMATION SHOP
PASTE as new image
BACK TO PSP
***UNDO Constellation. Back to PLUG IN, use diffrent random seed, repeat COPY MERGED and go to Animation shop, paste after selected frame. Do this 2 more times (more or less as you would like)*** Notice How many base layers you have in the bottom right corner
BACK to PSP. Add New Raster Layer.
Apply copyrights
Add any text you would like.
Merge the new layers if there is more then 1... COPY only the new layer (s)
PASTE in Animation shop as a NEW Animation
CTRL+SHFT+L to repete as many times as you have base layers
CTRL+SHFT+A to select all
CTRL+SHFT+C to copy
ON BASE LAYER
CTRL+SHFT+A
CTRL+SHFT+E to paste. Remember if you move your mouse you WILL move the layer. Be careful and do not click until it is where you want it. You can fix this with a simple undo.
RUN and SAVE your New tag!
Posted by Lorilynn at 9:47 AM 0 comments
Friday, July 10, 2009
Saturday, July 4, 2009
Paint Your Dreams

For this tutorial I used
the beautiful Starving Artiest Kit from Bits N Bobs which can be purchased HERE
the wonderful artwork of Suzanne Woolcott which can be purchased HERE
the mask I believe to be PSP X2 stock and I have included it in the tutorial, if it is NOT stock and the mask is your creation PLEASE let me know so I can correct this post.
Let us begin...
OPEN a NEW canvas I used 800x800 flood filled black
PASTE your rainbow as you would like it, I dropped mine down to a 75% transparency for the effect I wanted.
PASTE any other embellishments you would like. I used the bubbles and sparkels, with a 80% transparency and the disco ball as is at 100%
ADD Copyrights and wording (remember to stay away from the edges as your mask will delete them and you do not want to lose your copyrights!)
MERGE ALL
APPLY Mask
Save as a .png file.
I hope you enjoyed this simple tut! Have a blessed day ~Lorilynn
Posted by Lorilynn at 8:19 AM 0 comments


